7. Exercises
a. Introduction: Intrinsic, Limbering, and Conditioning Exercises
Most finger exercises are not useful because of a number of disadvantages (see h. Problems with Hanon Exercises). They can waste a lot of time. If the exercises are for developing the technique to play difficult pieces, the time will be better spent practicing the difficult pieces directly. Most exercises are repetitious, requiring no musical input which will turn off the musical brain. Mindless practice is harmful. Exercises are supposed to increase stamina; however, most of us have plenty of physical stamina to play but insufficient brain stamina; therefore mindless repetitive exercises can decrease our total musical stamina. Without proper guidance, students will practice these repetitions mechanically and, after a short time, gain no new skills. It is one way to create closet pianists who can practice only when no one is listening because they never practiced making music. Some accomplished pianists routinely use exercises for warming up, but this habit arose as a result of (incorrect) early training and concert pianists do not need them for their practice sessions.
Historically, the Hanon type exercises became widely accepted because of several misconceptions:
Technique can be acquired by learning a limited number of exercises
Music and technique can be learned separately
Technique requires mostly muscular development without brain development
Technique requires finger strength
Such exercises became popular with many teachers because, if they worked, the students could be taught technique with little effort from the teachers! This is not the fault of the teachers because these misconceptions were passed down through the generations, involving such famous teachers as Czerny, Hanon, and many others. The reality is that piano pedagogy is a challenging, time-consuming, knowledge-based profession.
If we define technique as the ability to play, then it has at least three components. It has an intrinsic technique component, which is simply your skill level. Having the skill, however, doesn’t mean you can play. For example, if you haven’t played for several days and the fingers are frozen cold, you probably won’t be able to play anything satisfactorily. So there is a second component, the degree to which the fingers are limbered up (warming up component). There is also a third component, which will be called conditioning. For example, for a person who had been chopping down huge trees for weeks, or someone who had done nothing but knit sweaters for days, the hands may not be in condition to play the piano. The hands have adapted to a different job. On the other hand, practicing at least three hours every day for months will enable the hands to perform incredible feats. Defining the components of technique is important because these definitions enable the identification of the exercises that are needed.
The intrinsic skill level and warming up of the hands are easy to understand, but conditioning is complex. Important factors controlling conditioning are the length and frequency of practice and the state of the brain/nerve/muscle system. In order to keep the hands in their best playing condition, most people will need to play every day. Skip a few days of practice, and the conditioning will deteriorate. Thus, although it was remarked elsewhere that practicing a minimum of three days a week can yield significant progress, this will clearly not result in the best conditioning. Conditioning is a much larger effect than some people realize. Advanced pianists are always acutely aware of conditioning because it affects their ability to play. It is probably associated with physiological changes such as dilation of blood vessels and the accumulation of certain chemicals at specific locations of the nerve/muscle system. As the skill level rises, this conditioning factor becomes more important for dealing with difficult technical material and the higher musical concepts such as color or the characteristics of different composers.
A more elusive factor that affects conditioning is the state of the brain/nerve system. Thus for no obvious reason, you can have “good” days and “bad” days. This is probably analogous to the “slumps” that afflict athletes. In fact “bad days” can last for extended periods of time. With the awareness of this phenomenon and experimentation, this factor can be controlled to some extent. Musicians, like golfers, etc., must learn how to diagnose their own problems. This awareness can help to better cope psychologically with those “bad” days. Professional athletes, such as golfers and those who practice meditation, etc., have long known the importance of mental conditioning. Discovering the causes of such bad days would be even more helpful. One common cause is FPD, which was discussed near the end of 25. Hands Together and Mental Play. Another common cause is deviation from fundamentals: accuracy, timing, rhythm, correct execution of expressions, etc. Playing too fast, or with too much expression, can be detrimental to conditioning. This is why it is so difficult to perform twice in a row, and it is necessary to know how to “reset” the conditioning between performances. Possible cures are to listen to a good recording, enlist the help of a metronome or to revisit the music score. Playing a composition slowly once before quitting is one of the most effective preventive measures against inexplicable “bad playing” of that composition later on. Thus conditioning depends not only on how frequently you practice, but also on what and how you practice. Solid mental play can prevent slumps; at least, you can use it to know that you are in a slump before you play. Better yet, you can use mental play to get out of the slump, by adjusting the time when your performance peaks. We all use a certain amount of mental play whether we know it or not. If you do not consciously use mental play, then slumps can come and go, seemingly for no reason, depending on the condition of your mental play. That is why mental play is so important for performers.
Fast vs. Slow Muscles
Understanding the difference between control/speed, and finger strength for technique, is important. All muscle bundles consist mainly of fast and slow muscles. The slow muscles provide strength and endurance. The fast muscles are necessary for control and speed. Depending on how you practice, one set grows at the expense of the other. Obviously, when practicing for technique, we want to grow the fast muscles and reduce the slow ones. Therefore, avoid isometric or strength type exercises. Practice quick movements, and as soon as the work is done, rapidly relax those muscles. This is why any pianist can outrun a sumo wrestler on the keyboard, even though the wrestler has more muscle. The fast muscles control the basic rapid finger stroke and these muscles are driven by a brain which has also been speeded up; see i. Practicing for Speed.
Most of the muscles that move the fingers are in the forearm (Prokop). There are some reports claiming that the most important piano playing muscles are the lumbricals (Jaynes) and the interossei (in the hands), but these are minority views that must await further research to carry any weight. It is clear, however, that “finger strengthening exercises” such as squeezing spring devices sold for this purpose, are bad for technique, especially speed. The research on “piano muscles” and brain speed are woefully inadequate. Because those who designed exercises in the past had little idea or research results on what the exercises need to achieve, most of those exercises are only marginally helpful, and how useful they were depended more on how you used them than their original design. For example, the main objective behind most exercises was to develop finger strength, which is wrong. Another concept was that the more difficult the exercise, the more advanced technique you learned. This is obviously not true; the only truth is that if you are advanced, you can play difficult material. Some of the simplest exercises (as we shall see) can teach the most advanced techniques, and that is the kind of exercise that is most useful.
b. Parallel Set Exercises for Intrinsic Technical Development
For exercises to be useful, they must be able to identify weaknesses and then strengthen those skills. We need a complete set of exercises, and they must be arranged in some logical order so that an exercise that addresses a particular need can be quickly located. I propose that the concept of parallel play provides the framework for devising a universal set of exercises. Parallel sets (PSs) are groups of notes that can be played simultaneously, like a chord. Any arbitrary musical passage can be constructed from combinations of PSs. Of course, PSs alone do not comprise a complete set of exercises; conjunctions, repetitions, jumps, stretching, etc., are also needed, and are addressed below. Apparently, Louis Plaidy taught exercises resembling PS exercises in the late 1800s.
All the PS exercises are HS exercises. However, you can practice them HT also, and in any combination, even 2 notes against 3, etc. At first, try a few of each exercise, then read c. How To Use The Parallel Set Exercises (Beethoven’s Appassionata, 3rd Movement) on how to use them. There is no need to practice PSs by themselves because, if expanded, there will be an infinite number (as they should be, if they are complete), so you will never practice them all. You will never need all of them either, and probably over half are redundant. Use these exercises only when needed (all the time!), so that the only requirement at this point is that you become familiar with them so that you can instantly call upon a specific, required exercise when the need arises – no more wasting of time doing unnecessary exercises! Once the problem is solved using a particular exercise, there is no need to keep repeating it, because you have acquired the desired skill. PS exercises should not be practiced every day like Hanon exercises; they are to be used for diagnosing difficulties and correcting them.
PS exercises are designed to test your technique. A beginner with no technique should fail all of them. Most students will initially have no idea how to play them correctly. It would be very helpful if someone could demonstrate a few for you if you had never done them before. I will make videos available as soon as I find the time. Intermediate students with 2 to 5 years of lessons should be able to play over half of them satisfactorily. Thus these exercises provide a means for measuring your progress. This is total technique development and therefore involves tone control and musical playing. Advanced students will still need them but, unlike developing students, they will need them only briefly, often for just a few seconds of practice and experimentation.
Exercise #1: This exercise teaches the basic motion that is needed for all following exercises. Play one note, for example, finger 1, e.g. thumb of RH, as four repetitions: 1111. In this exercise, we are learning how to repeat one “thing” rapidly; later, we will replace the “thing” with a PS so that we can save time by playing as many PSs as possible in a short time. Remember, one reason for practicing exercises is to save time. This repetition motion is needed in most PS exercises.
Play the 1111 as quadruplets (“quads”) of equal strength, or as one measure of
a 4/4 or a 2/4 time signature. The idea is to play them as fast as
possible, up to speeds of over one quad per second, with complete relaxation.
When you can play a quad to your satisfaction, try two: 1111,1111. The comma
represents a pause of any arbitrary length, which should be shortened as you
progress. Then string three, then four quads in rapid succession:
1111,1111,1111,1111. You “pass” this exercise at about one quad per second, 4
quads in succession, with only a brief pause between quads. Play them softly,
relaxed, and not staccato, as explained in more detail below. If you pass the
4-quad test, you should be able to play the quads as long and as fast you want,
with control and without fatigue. This seemingly trivial motion is much more
important than appears at first sight because it is the basis for all velocity
motions, as will become apparent when we come to PSs involving many fingers
such as those in fast Alberti accompaniments or tremolos. That is why we devote
so many paragraphs below to this exercise.
The thumb has four major ways to move down; the other fingers have three. The first motion is finger motion: with the hand motionless, you can press the keys with only finger motion, mainly by pivoting each finger at the knuckle (the “thumb knuckle” is at the wrist). The second motion is wrist motion: with the forearm motionless and rigid fingers, you can press a key with wrist motion only. The third motion is arm motion. With the fingers and wrist rigid, you can lower the finger by moving the entire forearm down. This motion originates at the shoulder. The fourth motion, which applies mostly to the thumb, is forearm rotation. Practice each of these motions separately, eliminating all stress. First, practice each slowly, with large, exaggerated motion. Then increase speed by decreasing the motion. You can further increase speed by combining the motions, because when you combine them, you need even smaller individual motions to accomplish the same key drop.
Let’s try this whole routine with the thumb as an example. In all of the following, stretch the thumb out comfortably; do not tuck it under the hand.
Thumb finger motion: Use only thumb motion to play the quad, moving it as far up and down as you can. Hand, arm, etc., do not move. Because of the large motion, you can play at only about one note per second (don’t worry if your speed is different, because each person can have very different numbers – same comment applies to other numbers discussed below). Let’s also assume that your maximum thumb motion is about 10 cm. Now move the thumb only 5 cm – you can play faster! Then try 3 cm, and so on, until the smallest motion that will still play the note. As you speed it up, stress will start to build – this is your maximum speed. There is no need to practice faster at this time.
Wrist motion: play the thumb by keeping the thumb rigid and pivoting the hand up and down at the wrist. The maximum motion will be about 10 cm, and as you decrease this motion, you will be able to increase the speed. The maximum speed with which you can play with wrist motion without stress should be about the same as for thumb motion alone.
Now combining motions #1 and #2; you should be able to play faster than the maximum of either motion.
Arm motion: keep thumb and wrist fixed and play the thumb by only moving the arm up and down. Start by lifting the thumb about 10 cm, and increase speed by decreasing this distance. You can reduce stress with a thrust motion of the arm with each quad, because this makes use of different muscles for each downstroke. You can also raise the wrist with each quad and further reduce stress.
Forearm rotation: now keep everything rigid and play the thumb by only rotating the forearm. Again, rotate the thumb up about 10 cm and play the note. Increase speed by reducing this distance. In principle, you should be able to combine all four motions, and even the arm thrust and raised wrist, to play the fastest motion humanly possible. Combining so many motions is very difficult; practice it by combining them in pairs. Some may decide to depend mostly on one motion, and add just a little of the others.
Every part of the body must be involved: fingers, hand, arm, shoulder, etc., not only the fingers. This does not mean that every part must move by a visible amount - they may appear stationary, but must participate. A large part of the “involvement” will be conscious relaxation because the brain tends to use too many muscles for even the simplest tasks. Try to isolate only the necessary muscles for each motion and relax all others. The final motion may give the appearance that only the finger is moving. From more than several feet away, few people will notice a 1 mm movement; if each part of the body moved less than one mm, the sum of those motions can easily add up to the several mm needed for the key drop, even without finger movement.
As the repetition speed increases, the fingers/hands/arms will automatically go into positions that are ideal; PSs will make sure of that. These positions will resemble those of famous pianists playing at a concert – after all, that is why they can play it. Therefore it is important, when attending concerts, to bring your opera glass and watch the details of the motions of professional pianists. To the untrained observer, a concert pianist may seem to be doing nothing unusual, but if you know the hand motions as explained here, you will see them executed beautifully.
Beginners, in their first year, may not be able to play at one quad per second. Do not force yourself to practice at speeds you cannot handle without stress. However, periodic, brief, excursions into your fastest playing are necessary for exploration purposes. Even students with over five years of lessons will find some of the following exercises difficult. Those practicing PSs for the first time should practice exercise #1 for a while, then practice #2 (below); if #2 becomes problematic at certain speeds (fatigue, stress), those problems can be solved by practicing #1 again (try it; you will find out what I mean). Then briefly examine the other exercises, but there is no need to do them all now, because there will be plenty of chances to practice them as the need arises when practicing with real music later on.
Practice Exercise #1 until all stress disappears and you can feel gravity pulling the arm down. As soon as stress builds up, you will not be able to feel the gravitational pull. Don’t try too many quads at once if you begin to lose control. Don’t keep practicing with stress because playing with stress can quickly become a habit. As stress builds up, the quads will start to slow down; therefore, the slowing down is a sign of stress – it is time to switch hands. Get one quad down well before adding another. The reason for stopping at four quads is that, once you can do four, you can usually do a large number in succession. However, exactly how many are needed, before you can play an indefinite number in succession, depends on the individual. If, after stringing two quads together, you can then play the quads indefinitely at any speed, then you have passed the test for Exercise #1, and don’t have to practice it again.
For the first few days of practice, there should be some improvements during practice because you are rapidly learning new motions and eliminating wrong ones. In order to make further progress, use the post practice improvement (PPI), because muscle/nerve growth throughout your body and brain will eventually be required. For PPI, instead of pushing for speed during practice, wait for the hand to automatically develop quickness so that you play faster the next time you practice; this can happen when you switch hands, or when you practice the next day.
This is technique acquisition, not muscle building. Technique means making music and these exercises are valuable for developing musical playing. Do not bang away, like a jack hammer. If you can’t control the tone of one note, how can you control it with more? One key trick in controlling tone is to practice softly. By playing softly you get yourself out of the mode of practice in which you totally ignore the nature of the sound and bang away, just trying to achieve the repetitions. Press down on the key completely and hold it down momentarily (very short – a fraction of a second). Read 1. Tone, Rhythm, Legato, Staccato (basic keystroke) which is mandatory reading before you do any serious PS exercises.
In order to increase speed and accuracy, and to control the tone, keep the playing finger near the key as much as possible. If the finger does not touch the key once in a while, you lose control. Do not rest the finger on the key all the time, but touch the key as lightly as you can so that you know where it is. This will give an added feel for where all the other keys are, and when it comes time to play them, the fingers will find the right keys more accurately. Determine the minimum key lift needed for repetition and practice playing with as little key lift as possible. The key lift is larger for uprights than grands. Faster speeds are achieved with smaller key lifts.
Experiment with controlling the tone using finger sliding: try the pull motion or thrust motion. Sliding increases control because you are creating a small key drop using a larger motion. The result is that any errors in the motion will be decreased by the ratio of key drop to total motion, which is always less than one. Therefore, you can play more uniform and softer quads by sliding than by coming straight down. Sliding also simplifies the finger motion because the finger does not have to come straight down – any motion with a downward component will do, which increases your options. The thumb may be the easiest finger to slide. Play with the tip of the thumb, not the joint; this will enable the thumb to slide and the wrist to be raised, thus reducing the chances of the other fingers accidentally hitting some keys. Playing with the tip also increases the effective range and speed of the thumb movement; that is, for the same thumb movement, the tip moves farther and faster than the joint. Knowing how to slide the fingers will let you play with confidence even when the keys are slippery or if they get wet from perspiration. Do not develop a dependence on the friction of the key surface to play the notes because it will not always be there for you. Playing with a raised wrist will cause the fingers to slide towards you during the key drop. With a low wrist, the fingers will tend to slide away from you, especially for fingers 2-5. Practice each of these sliding motions: practice all five fingers with the wrist up for a while; then with the wrist down. At an intermediate wrist height, the fingers will not slide, even if the keys are slippery!
Repeat Exercise #1 with all the fingers, one at a time. Some fingers (typically, 4 and 5) may be slower than the others. This is an example of how to use these exercises as a diagnostic tool to find the weak fingers.
Proper regulation of the piano action and voicing of the hammers is critical to successful execution of these exercises, both for acquiring new skills and for avoiding non- musical playing. This is because it is impossible to produce soft (or powerful, or deep) musical tones with worn hammers and defective actions. You will need expert guidance to avoid acquiring bad habits if you practice on such pianos.
Exercise #2. The 2-finger Parallel Set exercises: play 23 of the RH on CD as fast as you can, like a grace note. The idea is to play them rapidly, but under complete control. Obviously, the methods of Sections I and II will needed here. For example, if the RH can do one exercise easily, but a related exercise is difficult for the LH, use the RH to teach the LH. Practice with the beat on the 2 as well as with the beat on the 3. When that is satisfactory, play one quad as in exercise #1: 23,23,23,23. If you have difficulty with accelerating a 23 PS quad, play the two notes together as a “chord” and practice the chord quad exactly as you did the single note quad in exercise #1. Again, bring the quad up to speed, about a quad per second. Then increase the number of quads until you can string 4 quads in succession. Repeat the entire exercise with each of 12, 34 and 45. Then come down: 54, 43, etc. All the comments about how to practice for exercise #1 apply.
In this and subsequent exercises, the comments in preceding exercises almost always apply to succeeding exercises and will not generally be repeated. Also, I will list only representative members of a family of exercises and leave it to the reader to figure out all the other members of the family. The total number of exercises is much larger than you would initially think. Furthermore, if the different PS exercises are combined HT, the number of possibilities quickly becomes mind boggling. For beginners who have difficulty playing HT, these exercises may provide the best ways to practice HT play.
One objective of PSs is to teach the brain the concept of extreme velocity, up to almost infinity. Once the brain gets used to a certain maximum velocity, all slower velocities become easier to execute. Perform all the exercises initially using only the white keys. Once all the white key exercises are done, work on similar exercises including the black keys.
In the beginning, you may be able to play the 2 notes in succession very fast, but without much independent control. You can initially “cheat” and increase speed by “phase- locking” the two fingers, e.g., holding the two fingers in a fixed position (locked phase, 3 slightly higher than 2) and simply lowering the hand to play the two notes. One easy way to do this is to curl 2 a little more than 3. The phase angle is the delay between successive fingers in parallel play. Eventually, you must play with finger independence. The initial phase locking is used only to get up to speed quickly. This is one reason why some teachers do not teach parallel play, because they think that parallel play means phase locking, which is bad technique. One reason for this problem is that after phase locked play, both fingers stay on their keys and the two notes overlap. It is as important to lift the finger at some precise time as it is to lower it. For independent finger playing, the first finger must rise just as the second finger plays so that successive notes are clearly separated. Therefore, the ability to play 23 quads rapidly is not enough. What takes time to develop is the independent control of each finger.
Once you can play fast PSs relaxed, slow down and work on playing each note more correctly. Beginners will have difficulty lifting the fingers at the right time to control the note duration. In that case, either wait for technique to develop further, or practice the lifting exercises of d. Scales, Arpeggios, Finger Independence and Finger Lifting Exercises below.
Exercise #3: Larger PSs: e.g., 123 and its family, 234, etc. Repeat all of the procedures as in exercise #2. Then work with the 1234 group, and finally, the 12345 sets. With these large sets, you may have to slow down the quad repetition speed slightly. The number of possible exercises for these larger sets is very large. The beat can be on any note and you can start on any note. For example, 123 can be practiced as 231 and 312. When coming down, the 321 can be played 213 or 132; - all six are distinct because you will find that some are easy but some are difficult. If you include the beat variations, there are 18 exercises for just three fingers on white keys.
Exercise #4: Expanded PSs: start with the 2-note sets 13, 24, etc. (the 3rds group). These sets also include the 14 (fourths), and 15(fifth and octave), type groups. Then there are the 3-note expanded PSs: 125, 135, 145 (fifth and octave) groups. Here, there are several choices for the middle note. Then there are the expanded sets played with 12: thirds, fourths, fifths, etc.; these can also be played using 13, etc.
Exercise #5: The compound PSs: 1.3,2.4, where 1.3 represents an interval, i.e., CE played simultaneously. Then do the 1.4,2.5 group. I have often found sets that are easy going up but difficult coming down, or vice versa. For example, 1.3,2.4 is easier for me than 2.4,1.3. These compound sets will require quite a bit of skill. Unless you have had at least several years of lessons, do not expect to be able to play these with any proficiency.
This is the end of the repetitive quad exercises based on exercise #1. In principle, Exercises #1 to #5 are the only exercises you need because they can be used to construct the PSs we discuss below. Exercises #6 and #7 are too complex to be repeated in rapid quads.
Exercise #6: Complex PSs: these are best practiced individually instead of as rapid quads. In most cases, they should be broken up into simpler PSs that can be practiced as quads; at least, initially. “Alternating sets” are of the type 1324, and “mixed sets” are of the type 1342, 13452, etc., mixtures of alternating and normal sets. Clearly, there is a large number of these. Most of the complex PSs that are technically important can be found in Bach’s lesson pieces, especially his 2-part Inventions, see 20. Bach: the Greatest Composer and Teacher. This is why Bach’s lesson pieces (by contrast to Hanon) are some of the best practice pieces for acquiring technique.
Exercise #7. Now practice connected PSs; e.g., 1212, that contain one or
more conjunctions. This can be either a trill (CDCD) or a run (CDEF,
use thumb over). Now these sets cannot be played infinitely fast because the
speed is limited by your ability to connect the PSs. The objective here is
still speed – how fast you can play them accurately and relaxed, and how many
of them you can string together. This is an exercise for learning how to play
conjunctions. These can be practiced by “adding overlapping PSs”: practice 12,
then 21, then 121, then 1212. Play as many notes as possible during one motion
of the hand. For example, practice playing 1212 in one down motion of the
hand.
Connected PSs are the main practice elements in Bach’s 2-part Inventions. Therefore, look into these Inventions for some of the most inventive and technically important connected PSs. As explained in c. “Normal” Practice Routines and Bach’s Teachings, it is often difficult for students to memorize certain Bach compositions and to play them beyond a certain speed. This has limited the popularity of playing Bach, and limited the use of this most valuable resource for acquiring technique. However, when analyzed in terms of PSs and practiced according to the methods of this book, Bach’s compositions can become quite simple to learn. Therefore, this book should greatly increase the popularity of playing Bach.
The nearly infinite number of PS exercises needed demonstrates how woefully inadequate the older exercises are (e.g., Hanon - I will use Hanon as a generic representative of what is considered the “wrong” type of exercise here; I don’t mean to keep picking on Hanon because it can help your technique). There is one advantage of the Hanon type exercises, however, which is that they start with the most commonly encountered fingerings and the easiest exercises; i.e., they are nicely prioritized. However, chances are nearly 100% that they will be of little help when you hit a difficult passage in an arbitrary piece of music. The PS concept allows us to identify the simplest possible series of exercises that form a more complete set that will apply to practically anything that you might encounter. As soon as these exercises become slightly complex, their number becomes enormous. By the time you get to the complexity of even the simplest Hanon exercise, the number of possible PS exercises becomes intractably large. Even Hanon recognized this inadequacy and suggested variations such as practicing the exercises in all possible transpositions. This certainly helps, but still lacks whole categories such as Exercises #1 and #2 (the most fundamental and useful ones), or the incredible speeds anyone can readily achieve with PS exercises.
It is easy to bring Hanon up to ridiculous speeds by using the methods of this book. Try that just for the fun of it – you will quickly find yourself asking, “What am I doing this for?” Even those ridiculous speeds cannot approach what you can readily achieve with PSs because every Hanon exercise contains at least one conjunction and therefore cannot be played infinitely fast. This is clearly the biggest advantage of PS exercises: there is no speed limit in theory as well as in practice, and therefore allows you to explore speed in its entire range .
As one illustration of the usefulness of these exercises, suppose that you want
to practice a four-finger compound trill based on exercise #5 (e.g.,
C.E,D.F,C.E,D.F,...). By following the exercises in order from #1 to #7,
you now have a step-by-step recipe for diagnosing your difficulties and
acquiring this skill. First, make sure that your 2-note intervals are even by
applying exercises #1 and #2 (12 & 34). Then try 1.3,2 and then 1.3,4. When
these are satisfactory, try 1.3,2.4. Then work on the reverse: 2.4,1 and 2.4,3,
and finally 2.4,1.3. The rest should be obvious if you have read this far.
These can be rough workouts, so remember to change hands frequently, before
fatigue sets in.
It is re-emphasized here that there is no place in the methods of this book for mindless repetitive exercises. Such exercises have another insidious disadvantage. Many pianists use them to “limber up” and get into great playing condition. This can give the wrong impression that the wonderful playing condition was a consequence of the mindless exercises. It is not; the limbered up playing condition is the same regardless of method. Therefore, the pitfalls of mindless exercises can be avoided by using more beneficial ways of limbering up. Scales are useful for loosening the fingers and arpeggios are useful for loosening the wrists. And they are useful for learning some very basic skills, as we saw in 5. Playing Fast: Scales, Arpeggios, and Chromatic Scales above.
c. How To Use The Parallel Set Exercises (Beethoven’s Appassionata, 3rd Movement)
PS exercises are not intended to replace the Hanon, Czerny, etc., or any type of exercise. The philosophy of this book is that time can be better spent practicing “real” music than “exercise” music. The PS exercises were introduced because there is no known faster way to acquire technique. Thus, technical pieces like Liszt’s and Chopin’s etudes or Bach’s Inventions are not “exercise music” in this sense. The PS exercises are to be used in the following ways:
For diagnostic purposes: going through these exercises systematically will reveal your strengths and weaknesses. More importantly, for practicing a passage you cannot play, PSs provide a method for identifying the problem. In hindsight, it seems obvious that any effort to improve some technical aspect will require a diagnostic tool. Otherwise it is like going to a hospital for an operation without knowing the cause of the malady. According to this medical analogy, practicing Hanon is like going to the hospital to get the same “universal” checkups/treatments every day regardless of whether the patient is seriously ill or healthy – the correct approach is a good diagnosis and targeted treatment only when the person is sick; moreover, once cured, there is no need to keep taking the same medication.
For acquiring technique: the weaknesses found in #1 can now be corrected using the same exercises that diagnosed them. In principle, these exercises never end, because the upper limit of speed/technique is open ended. However, in all practicality, they end at speeds of around one quad per second because few, if any, music requires higher speeds. This demonstrates the beauty of these exercises in enabling practice speeds that are faster than needed, thus providing that extra margin of safety and control.
Procedures #1 and #2 will solve many problems in playing difficult material. Several successful applications to previously “impossible” situations will generate the confidence that nothing is unconquerable, within reason. As an example, consider one of the most difficult passages of the third movement of Beethoven’s Appassionata, bar 63, the LH accompaniment to the climactic RH run, and similar, ensuing passages. Listen to recordings carefully, and you will find that even the most famous pianists have difficulty with this LH and tend to start it slowly and then accelerate it, or even simplify the score. This accompaniment consists of the compound PSs 2.3,1.5 and 1.5,2.3, where 1.5 is an octave. Acquiring the required technique simply boils down to perfecting these PSs and then joining them. For most people, one of the above two PSs will be difficult, and that is the one you need to conquer. Trying to learn this by playing it slowly and accelerating it HT would take much longer to learn and brings no guarantee of success, because it becomes a race between success and building a speed wall. Instead, practice HS and change hands frequently to avoid stress and fatigue. Also, practice it softly in the beginning in order to learn to relax.
In summary, the parallel set exercises comprise one of the main pillars of the methods of this book. They are one of the reasons for the claim that nothing is too difficult to play if you know how to practice. They serve both as diagnostic tools and as technique development tools. Practically all technique should be acquired using PSs during HS practice to bring up the speed, to learn to relax, and to gain control. They form a complete set of necessary tools. Unlike Hanon, etc., they can be immediately summoned to help when you hit any difficult passage and they allow practice at any speed, including speeds higher than anything you will ever need. They are ideal for practicing to play without stress and with tone control. In particular it is important to get into the habits of sliding the fingers over the keys and feeling the keys before playing them. Sliding the fingers (caressing the keys) provides tone control and feeling the keys improves accuracy. Without breaking up a difficult passage into simple PSs, it is impossible to incorporate these extra refinements into your playing. We now move on to other useful exercises.
d. Scales, Arpeggios, Finger Independence and Finger Lifting Exercises
Scales and arpeggios must be practiced diligently. They are not in the class of mindless repetitive exercises because of the numerous necessary techniques that are most quickly acquired using them (such as thumb over, flat finger positions, feeling the keys, velocity, PSs, glissando motion, tone/color, how to reverse directions, supple wrist, etc.). Scales and arpeggios must be practiced HS; practicing them HT all the time will place them in the same category as Hanon. Two exceptions to this “no HT rule” are:
When you are using them for warm-ups (before recitals, etc.)
When practicing to make sure that the two hands can be synchronized accurately
Learning to play them well is very difficult and you will certainly need PSs, see b. Playing with Flat Fingers and 5. Playing Fast: Scales, Arpeggios, and Chromatic Scales for more details.
The finger independence and lifting (see below) exercises are performed by
first pressing all five fingers down, e.g., from C to G using the RH.
Then play each finger three to five times: CCCCDDDDEEEEFFFFGGGG. While one
finger is playing, the others must be kept down. Do not press down firmly as
this is a form of stress, and will cause fatigue very quickly. Also, you don’t
want to grow any more slow muscles than is necessary. All the depressed keys
must be completely down, but the fingers are resting on them with only enough
downward force to keep the keys down. The gravitational weight of the hand
should be enough. Beginners may find this exercise difficult in the beginning
because the non- playing fingers tend to collapse from their optimum positions
or lift involuntarily, especially if they begin to tire. If they tend to
collapse, try a few times and then switch hands or quit; do not keep practicing
in the collapsed position. Then try again after a rest. One variation of this
exercise is to spread out the notes over an octave. This type of exercise was
already in use during F. Liszt’s time (Moscheles). They should be done using
the curled as well as all the flat finger positions.
For the finger independence exercise, try to increase the speed. Note the similarity to PS exercise #1, b. Parallel Set Exercises for Intrinsic Technical Development. For general technique development, exercise #1 is superior to this one. The main objective of exercise #1 was speed; the emphasis here is different – it is for finger independence. Some piano teachers recommend doing this exercise once during every practice session, once you can play it satisfactorily. Until you can play it satisfactorily, you may want to practice it several times at every practice session. Practicing it many times at once and then neglecting it in subsequent sessions will not work.
All the practice methods and exercises discussed in this book deal mostly with the muscles used to press the key down (flexors). It is possible for those muscles to become far more developed than the ones used to lift the fingers (extensors), especially for those who practice loud all the time and never develop the art of playing fast, thus causing control problems. Eventually, the flexors can end up overpowering the extensors. Therefore, it is a good idea to exercise the relevant extensors by performing lifting exercises. The flat finger positions are valuable for exercising the extensors for lifting the fingers and, at the same time, relaxing the extensors near the fingertips. These two extensors use different muscles.
For finger lifting exercises, repeat the above exercise, but lift each finger as high as you can, quickly and immediately down. The motion should be as fast as you can, but slow enough that you have complete control; this is not a speed contest, you just have to avoid growing the slow muscles. Again, keep all the other fingers down with minimal pressure. As usual, it is important to reduce stress in the fingers that are not being lifted. Practice rapid relaxation immediately after a hard lift.
Everyone has problems with lifting the 4th finger. There is a mistaken belief
by many that we must be able to lift the 4th finger as high as all the others
and therefore they expend an inordinate amount of effort trying to achieve
this. Such efforts have been proven to be futile and even harmful. This is
because the anatomy of the 4th finger does not allow it to be lifted beyond a
certain point. The only requirement on the 4th finger is not to depress a key
inadvertently, which can be met with only a small amount of lift. Therefore you
can play at all times with the 4th finger barely off the keys or even touching
them. Practicing difficult passages with inordinate effort at lifting this
finger higher can cause stress in fingers 3 and 5. It is more productive to
learn to play with less stress as long as the 4th finger is not interfering in
any way. The exercise for lifting the 4th finger independently is performed as
follows. Press all fingers down, CDEFG, as before. Then play 1,4,1,4,1,4, .
., with the accent on 1 and lifting 4 as quickly and as high as you can. Then
repeat with 2,4,2,4,2,4, … Then 3,4, then 5,4. You can also do this
exercise with 4 on a black key.
Both the finger independence and lifting exercises can be performed without a piano, on any flat surface. This is the best time to practice relaxing the extensor muscles of the last two phalanges (the nail phalange and middle phalange) of fingers 2 to 5; see b. Playing with Flat Fingers for more details. During the entire exercise, those two phalanges for all the fingers should be completely relaxed, even for the finger being lifted.
e. Playing (Wide) Chords, Finger/Palm Spreading Exercises
In 10. Gravity Drop, Chord Practice, and Relaxation the gravity drop was used to improve chord accuracy. However,
if there is still unevenness after using the gravity drop, then there is a
fundamental problem that must be diagnosed and treated using the PS exercises.
Chords become uneven when the control over individual fingers is uneven. Let’s
take an example. Suppose that you are playing a LH C.E interval against a
G in octave 3. The C3.E3 and G3 are played with the fingers 5.3 and
1, a series of 5.3,1,5.3,1,5.3,1, etc. Let’s further assume that there is an
interval problem with the 5.3. These two fingers do not land simultaneously.
The way to diagnose this problem is to try the 5,3 PS, and then test 3,5. If
you have a problem, chances are that you have more of a problem with one than
the other, or both. Typically, 3,5 is more difficult than 5,3 because of the
bone structure in the forearm. Work on the problematic PS(s). Once you can play
both PSs well, the interval should come out better. There is a smaller
possibility that the problem lies in the 5,1 or 3,1 PSs, so if the 5,3 did not
work, try these.
The hand has two sets of muscles that spread the fingers/palm to reach wide chords. One set mainly opens the palm and the other mainly spreads the fingers apart. When stretching the hand to play wide chords, use mainly the set of muscles that open the palm. The feeling is that of spreading the palm but with free fingers; i.e., spread the knuckles apart instead of the fingertips. The second set of muscles simply spread the fingers apart. This spreading helps to widen the palm but it interferes with the finger movement because it tends to lock the fingers to the palm. Cultivate the habit of using the palm muscles separately from the finger muscles. This will reduce both stress and fatigue when playing chords, and improve control. Of course, it is easiest to use both sets of muscles simultaneously, but it is useful to know that there are 2 sets of muscles when planning exercises and for deciding how to play chords.
Finger spreading: In order to test whether the fingers are fully stretched, open the palm to its maximum and spread the fingers for maximum reach; do this on a flat surface with the wrist touching the surface. If the pinky and thumb form a almost straight line, the fingers will not stretch any more. If they form a “V”, then the reach can be expanded by performing spreading exercises. Another way to test this alignment is to place the palm on a table top at the edge of the table with the thumb and pinky down the edge, so that only fingers 2, 3, and 4 are resting on the table top. If the thumb and pinky form a triangle with the edge of the table, the stretch can be expanded. It is possible to “cheat” by raising the wrist, but this results in an awkward position and a smaller reach. Perform a spreading exercise by pushing the hand towards the table edge so as to spread the thumb and pinky apart. You can save some time by stretching one hand using the top edge of the piano while practicing HS with the other.
Note
Need to embed palm stretch photo: http://www.pianopractice.org/palmstretch.jpg
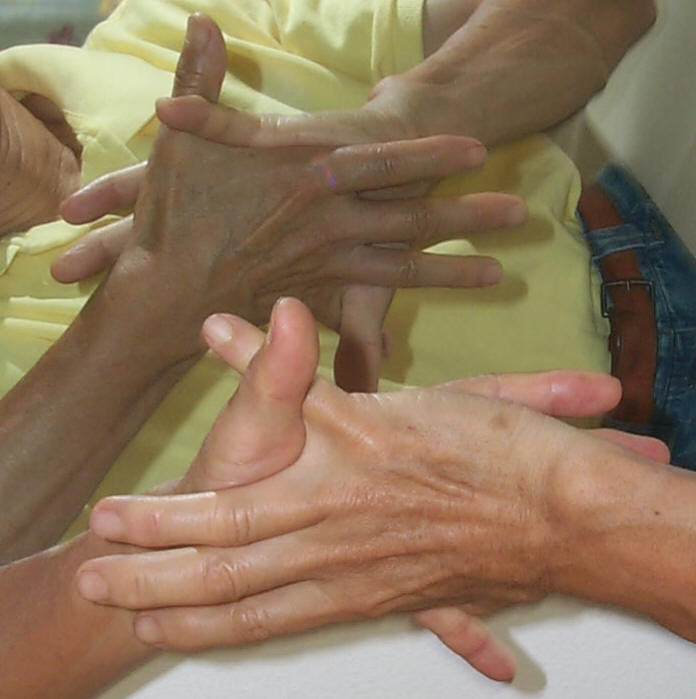
Palm spreading: It is more important, but more difficult, to stretch the palm instead of the fingers. One way is to place the right palm over the left palm, right arm pointing left and left arm pointing right, with the hands in front of the chest. In this position, thumb meets pinky; interlock the thumbs and pinkies so that fingers 2,3,4 are on the palm side and 1,5 protrude on the back side of palm. Then push the hands towards each other so that thumbs and pinkies push each other back, thus spreading the palm. This is illustrated in the photo III.7a. Also, exercise the palm and finger spreading muscles while simultaneously applying the pushing force. This is not an isometric exercise, so the stretching motions should be quick and short. This ability to quickly stretch and immediately relax is important for relaxation. Regular stretching when young can make a considerable difference in the reach when you get older, and periodic maintenance will prevent the reach from decreasing with age. The webbings between fingers can be stretched by jamming them against each other using the two hands. For example, to stretch the webbings between fingers 2 and 3, spread those 2 fingers on both hands to form Vs. Then jam the vertices of the 2 Vs against each other. For maximum effectiveness, use the palm and finger spreading muscles to stretch the palm with every jamming motion. Again, don’t perform these like isometric exercises but use quick motions. Most people have a slightly larger left hand, and some can reach more by using fingers 1,4 than 1,5.
When playing wide chords, the thumb should be curved slightly inwards, not fully stretched out. For those who have thumbs that can bend backwards, pay attention to this thumb position for maximum stretch; if you form the habit of bending the thumb all the way backwards, this habit will be almost impossible to reverse and make TO difficult. It is counter-intuitive that, by bending the thumb in, you can reach further; this happens because of the particular curvature of the thumb’s fingertip. When playing chords, the hand must move to those chord positions, and these motions must be very accurate if the chords are to come out right. This is the “jump” motion discussed below; you will need to develop proper jump motions as well as a habit of feeling the keys in order to execute chord play. You can’t just raise the hand high above the keys, position all the fingers in the right position, smash them down, and expect to hit all the correct notes exactly at the same instant. Great pianists often appear to do that, but as we shall see below, they are not. Therefore, until you have perfected the jump movement and are able to feel the keys, any problems with playing chords may not be caused by lack of reach or finger control. It is now time to study how to execute jumps.
f. Practicing Jumps
Many students watch famous pianists make quick, wide jumps and wonder why they can’t do jumps themselves, no matter how hard they practice. These great pianists appear to jump effortlessly, playing notes or chords accurately from position to position no matter where they are. In reality, they are making several motions that are too fast for the eye to see unless you know what to look for. Students with no jump training tend to move the hand along an inverted V motion. With this type of motion, it is difficult to hit a note or chord accurately because the hand is coming down at some arbitrary angle. This angle is never the same because it depends on the distance of jump, the tempo, how high the hand was lifted, etc. Coming down at an angle increases the possibility of missing the correct location, and the keys are played by a sideways motion instead of straight down. Fast jumps are impossible because you can never get there in time.
Jumps consist of two principal motions:
A horizontal translation of the hand to the correct position
The actual downward motion to play
In addition, there are two optional motions: feeling the keys and the take-off motion. The combined motion should look more like an inverted “U” than an inverted “V”. This inverted U has short legs and a flat top. The first skill to practice is to make the horizontal motion as fast as possible so as to reserve enough time to locate the keys after the hand reaches its destination. Locate the keys by feeling them before the actual playing. Feeling the keys is optional because it is not always necessary and sometimes, there is not enough time for it. When this combination of motions is perfected, it looks as if it is done in one motion.
Feeling the keys can be done surprisingly quickly. There is usually plenty of time to do this. Therefore, it is a good policy to always feel the keys when practicing jumps slowly. When all the skills listed here are perfected, there will be enough time to feel the keys even at the final speed. There are a few instances in which there is no time to feel the keys, and those few can be played accurately if you had located most of the other jumps accurately by feeling them.
Another component of the jump is the take-off. Get into the habit of making quick takeoffs regardless of the speed of the jump. There is nothing wrong with getting there way ahead of time. Even when practicing slowly, you should practice quick takeoffs so that the skill will be there when you speed up. Start the take-off with a small downward and sideways kick of the wrist; unlike the downward motion at the end, the take-off does not have to be straight up and it can be combined with the rapid horizontal travel. Obviously, the entire jump procedure is designed for the hand to arrive at the destination quickly, accurately, and reproducibly so that there is plenty of time to play straight down and feel the keys.
The most important motion to practice once you know the components of a jump is to accelerate the horizontal travel. You will be surprised at how fast the hand can move horizontally. You may be amazed at how much faster you can move with only a few days of practice – something some students never achieve in a lifetime because they were never taught to practice it. This horizontal speed is what provides that extra time needed to ensure 100% accuracy and to effortlessly incorporate all the other components of the jump. Practice feeling the keys whenever possible so that it becomes second nature and you can find the keys without looking at your hands. Once it is smoothly incorporated into your play, the audience will not notice that you are feeling the keys because it is done in a fraction of a second. Like an accomplished magician, the hands will move faster than the eye can see.
Now that you know the components of a jump, look for them when you watch concert pianists performing. You should now be able to identify each component, and you may be amazed at how often they feel the keys before striking them and how they can execute these components in the blink of an eye. These skills will also enable you to play, and even make long jumps, without looking at the hands.
The best way to practice fast horizontal motions is to do it away from the piano. Sit down with the elbow straight down, forearm pointing forward, fingers spread out in horizontal plane or in piano playing position. Quickly move the hand sideways, parallel to the floor, as in a jump motion. Move the hand rapidly away from you and stop, then immediately relax; the shoulder does not move. Then move rapidly back to its original position. Practice these out and in motions, as fast as you can, but completely relaxing after each motion. Do not try to learn these motions in one day, although from day one, you should see immediate improvements in your jumps if you had never done this before. The most significant improvements will have to await post practice improvement, so it is futile to try to accomplish it in one day.
As you learn to accelerate the horizontal motion, jumps will immediately become
easier. In order to reduce stress, relax all muscles as soon as the horizontal
motion is over, and as soon as the notes are played.. A good piece to practice
the jump for the LH is the 4th variation in Mozart’s famous Sonata in A,
#16 (K300). This variation has large jumps in which the LH crosses over the
RH. One popular piece you can use to practice RH jumps is the 1st movement of
Beethoven’s Pathetique Sonata (Opus 13), right after the LH octave
tremolos, where the RH makes jumps crossing over the LH. A more challenging
passage to practice is in Chopin’s Ballade Op. 23, at the end, the LH jumps
in the first half of the “Presto con fuoco”.
Practice accelerating the horizontal motion by playing at a slow tempo, but moving horizontally as quickly as you can, stopping over the correct position, feeling the keys and waiting before playing. Feeling the notes will guarantee 100% accuracy. The idea here is to establish a habit of always getting to the destination ahead of time. Once the quick horizontal motion is satisfactory, speed up the tempo by reducing the waiting time before playing the notes. Then gradually combine all four jump components into one smooth motion. Now your jump looks like that of those great pianists you envied! Better yet, jumps aren’t that difficult or scary, after all.
g. Stretching and Other Exercises
Most stretching exercises for the large muscles of the body are helpful (see Bruser). To stretch the flexor muscles (for the fingers): with the palm of one hand, push the fingers of the other hand back towards the top of the forearm (for photos, see Prokop, P. 75). People have very different flexibility and some will be able to push the fingers back so that the fingernails will touch the arm (180 degrees from the straight forward position!), while others may be able to push back only about 90 degrees (fingers pointing up with the forearm horizontal). The ability of the flexor muscles to stretch decreases with age; therefore, it is a good idea to stretch them frequently throughout life in order to preserve their flexibility. For stretching the extensor muscles, press the back of the fingers towards the bottom of the forearm. You might perform these stretching exercises just before “playing cold”.
There are numerous exercises in Sandor and Fink. These are interesting because each exercise is chosen to demonstrate a particular hand motion. In addition, the motions are often illustrated using passages taken from classic compositions by famous composers.
h. Problems with Hanon Exercises
Since about 1900, Charles Louis Hanon’s (1820-1900) exercises have been used by numerous pianists in the hopes of improving technique. There are now two schools of thought: those who think that the Hanon exercises are helpful and those who think they are a waste of time. There is one “reason” some people give for using Hanon: that is to warm up the hands before starting practice. I suspect that this habit grew out of having learned Hanon early in the person’s piano career, and that this same person would not be using Hanon if s/he were not so habituated.
I used Hanon exercises extensively in my youth but I am now firmly in the anti- Hanon school. Below, I list some reasons why. Czerny, Cramer-Bulow, and related lesson pieces share many of these disadvantages. Hanon is possibly the prime example of how intuitive methods can suck entire populations of pianists into using methods that are essentially useless, or even harmful.
Hanon makes some surprising claims in his introduction with no rationale, explanation or experimental evidence. This is exemplified in his title, “The Virtuoso Pianist, in 60 Exercises”. His introduction shows that he simply felt that these are useful exercises and so wrote them down, a prime example of the “intuitive approach”. Most advanced teachers reading this introduction would conclude that this approach to acquiring technique is amateurish and would not work. Hanon implies that the ability to play these exercises will ensure that you can play anything – this is not only totally false, but also reveals a surprising lack of understanding of what technique is. Technique can only be acquired by learning many compositions from many composers. There is no question that there are many accomplished pianists who use Hanon exercises. However, all advanced pianists agree that Hanon is not for acquiring technique, but might be useful for warming up or keeping the hands in good playing condition. There are many better pieces for warming up than Hanon, such as etudes, numerous Bach compositions, scales, and arps. The skills needed to play any significant piece of music are incredibly diverse - almost infinite in number. To think that technique can be reduced to 60 exercises reveals the naiveté of Hanon and any student who believes that is being misled.
All 60 are almost entirely two-hand exercises, in which the two hands play the same notes an octave apart, plus a few contrary motion exercises in which the hands move in opposite directions. This locked HT motion is one of the greatest limitations of Hanon’s exercises because the better hand cannot practice skills more advanced than the weaker hand. At slow speed, neither hand gets much workout. At maximum speed, the slow hand is stressed while the better hand is playing relaxed. Because technique is acquired mostly when playing relaxed, the weaker hand develops bad habits and the stronger hand gets stronger. The best way to strengthen the weaker hand is to practice that hand only, not by playing HT. In fact, the best way to learn Hanon is to separate the hands as recommended in this book, but Hanon seems to have been unaware of that. To think that by playing HT, the weaker hand will catch up to the stronger hand, reveals a surprising ignorance for someone with so much teaching experience. This is what I meant by “amateurish” above; more examples below. Locking the two hands does help to learn how to coordinate the hands, but does nothing to teach independent control of each hand. In practically all music, the two hands play different parts. Hanon doesn’t give us any chance to practice that. Bach’s Inventions are much better and (if you practice HS) will really strengthen the weaker hand. Hanon is very limited; it teaches only a fraction of the total technique.
There is no provision for resting a fatigued hand. This leads to stress and injury. A diligent student who fights the pain and fatigue in an effort to carry out Hanon’s instructions will almost surely build up stress, acquire bad habits, and risk injury. The concept of relaxation is never even mentioned. Piano is an art for producing beauty; it is not a macho demonstration of how much punishment your hands, ears, and brain can take. Dedicated students often end up using Hanon as a way of performing intense exercises in the mistaken belief that piano is like weight lifting and that “no pain, no gain” applies to piano. Such exercises might be performed up to the limit of human endurance, even until some pain is felt. This reveals a lack of proper education about what is needed to acquire technique. The wasted resources due to such misconceptions can mean the difference between success and failure for a large number of students, even if they don’t suffer injury. Of course, many students who routinely practice Hanon do succeed; in that case, they work so hard that they succeed in spite of Hanon.
The Hanon exercises are devoid of music so that students can end up practicing like robots. It does not require a musical genius to compile a Hanon type of exercises. The joy of piano comes from the one-on-one conversations with the greatest geniuses that ever lived, when you play their compositions. For too many years, Hanon has taught the wrong message that technique and music can be learned separately. Bach excels in this respect; his music exercises both the hands and the mind. Hanon probably excerpted most his material from Bach’s famous Toccata and Fugue, modified so that each unit is almost self cycling. The remainder was probably also taken from Bach’s works, especially the Inventions and Sinfonias.
Many pianists use Hanon as warm-up exercises. This conditions the hands so that it becomes impossible to play “cold”, something any accomplished pianist should be able to do, within reasonable limits. Since the hands are cold for at most 10 to 20 minutes, “warming up” robs the student of this precious, tiny, window of opportunity to practice playing cold. Those who use Hanon for warm-ups can be misled into thinking that it is Hanon that is making their fingers fly, while in reality, after any good practice session, the fingers will be flying, with or without Hanon. It is unfortunate that the Hanon type of thinking has bred a large population of students who think that only Mozart can just sit down and play, and that the rest of us are not supposed to perform such “magical feats”. In order to be able to “play on demand”, start by quitting Hanon exercises.
Some technique can be acquired using Hanon. But Hanon gives no instructions on how to acquire technique. If students used their “Hanon time” to practice real music, they would acquire a lot more technique. Who wouldn’t rather play Mozart, Bach, Chopin, etc., than Hanon with better results and build a repertoire they can perform? Hanon cannot help if you get stuck at a difficult passage in another composition; it does not provide any diagnostics for telling you why you can’t play a given passage. The PS exercises provide both diagnostics and solutions for most situations.
What little advice he does dispense, have all been shown to be wrong! So let’s look into them:
He recommends “lifting the fingers high”, an obvious no-no for fast playing, since that will be the biggest source of stress. I have never seen a famous pianist in concert lift the fingers high to play a fast run; in fact, I have never seen anyone do that! Hanon’s advice has misled students into thinking that piano should be played by lifting the finger and plonking it down. It is true that the extensor muscles are often neglected, but there are exercises for treating this problem directly.
He recommends continuous practicing of both hands, as if piano technique is some kind of weight lifting exercise. Students must never practice with fatigued hands. This is why the HS method of this book works so well.
He recommends playing his exercises every day, but once any skill is acquired, it doesn’t need to be reacquired over and over. Once all 60 pieces are learned, every hour that Hanon is repeated is a wasted hour – what will we gain?
He is apparently aware of only the thumb under method, whereas the thumb over method is more important at faster speeds.
In most of the exercises, he recommends fixed wrists which is only partially correct. His recommendation reveals a lack of understanding of what “quiet hands” means.
There is no way to practice a majority of the important hand motions, although there are a few wrist exercises for repetitions. His format of locked 2-hand practice limits the options for practicing different hand motions.
The Hanon exercises do not allow for practicing at the kinds of speeds possible with the PS exercises. Without the use of such speeds, certain fast speeds cannot be practiced and there is no possibility of practicing “over-technique” (more technique than necessary to play that passage - a necessary safety margin for performances).
Hanon wastes time. The student ends up with insufficient time to develop their repertoire or acquire real technique. A person who has 2 hrs to practice every day, playing Hanon for 1 hr as recommended, would waste half of his piano lifetime! A person who has 8 hours to practice, on the other hand, doesn’t need Hanon. All the editions I have seen print out the entire runs, whereas all you need are at most 2 bars ascending and 2 bars descending and the final ending bar. Although the number of trees cut down to print Hanon is negligible in the broader picture, this reveals the mentality behind these exercises of simply repeating the intuitively “obvious” without really understanding what you are doing, or even pointing out the important elements in each exercise. “Repetition is more important than the underlying technical concepts” – this is probably the worst mentality that has hindered students most in the history of piano; we now know that this mentality evolved because of a lack of knowledge concerning practice methods.
Teachers can be classified into two types according to whether they teach Hanon or not. Those who do not teach Hanon tend to be more knowledgeable because they know the real methods for acquiring technique and are busy teaching them – there is no time left for Hanon. Thus if you are looking for a piano teacher, choose from among those that do not teach Hanon, and you will increase the chances of finding a superior one.
i. Practicing for Speed
Piano playing is all about exquisite finger control. As we increase speed, such control becomes progressively difficult because human hands were not created for such speeds. However, the hands are complex and adaptable, and we know from history that such fast playing is possible.
Speed Stroke, Relaxation
It seems obvious that fast keystroke motion is the key to fast play, yet it is often not taught. The single most important concept for speed is finger motion at the knuckle joint. Every finger has 3 bones. The knuckle joint is the joint between finger and palm. For the thumb, the knuckle joint is very close to the wrist. In speed play, consider each finger as a unit and simply move it at the knuckle joint. This motion has innumerable advantages. It uses only one finger-moving muscle which is also the fastest muscle. Moving the finger at the knuckle is especially important for the thumb. You can’t play anything fast if the thumb can’t keep up with the other fingers. Involving any other finger-bending muscle would complicate the motion, creating nerve-impulse delays that start all the way from the brain. This is the explanation of why TU doesn’t work for fast play – in TU, the other 2 thumb joints must bend, which is a slower motion. This also explains why flat finger positions are faster than curled positions. Thus when playing fast, don’t concentrate on the fingertips, but use the feeling that the fingers are moving at the knuckles. Motion at the knuckle is also most conducive to relaxation – in speed play, rapid relaxation becomes more important.
The 3 components of the basic keystroke (a. What is “Good Tone”?) must now be accelerated. The downstroke must be as fast as possible. The hold is important because you must instantly relax during the hold, yet not lift the finger so that the backcheck is not prematurely released. Then the lift stroke must come at exactly the correct time, and likewise accelerated. In section (a. Introduction: Intrinsic, Limbering, and Conditioning Exercises), we saw that all muscle bundles consist of fast and slow muscles; therefore, we need to develop fast muscles and fast nerve responses when practicing for speed, and reduce the amount of slow muscles. Practicing with all your strength for hours will be counterproductive. Playing faster doesn’t usually work either, because it only makes it harder to practice any of these stroke components. It also means that speed is going to take some time to develop because of the need to grow the necessary cells in the brain, muscles, and nerves. It is important to learn the speed motions. Don’t lean into the piano in order to keep all the notes down, because that will grow slow muscles – carefully control the finger pressure when “playing deeply for good tone”. Practice each stroke component separately, then assemble them after they are all accelerated. This means practicing each note slowly, but executing each component rapidly. If you play lots of notes rapidly, you may never get it right.
The simplest way to practice the speed stroke is to play the 5 notes, C-G,
in succession, carefully practicing each stroke component. For the downstroke,
practice the motion as rapidly as you can, yet retain the ability to control
the loudness, and to keep a steady residual pressure for the hold component,
and immediately relaxing. This is similar to the basic keystroke except that
everything must now be accelerated. During the transition to the hold, practice
immediate relaxation while maintaining enough pressure to hold the backcheck in
place. Then rapidly raise the finger for the lift component at the same time
that the next finger executes the downstroke. All the non-playing fingers
should be touching the key tops, not waving high above the keys. It may be
easier to first practice the notes in pairs, 121212 …, then 232323… .,
etc. Play at one or two notes per second initially, and speed up gradually.
Exaggerate the lift stroke because the extensor muscles are too weak for most
people and need extra workout. Involve the whole body while staying relaxed;
the feeling is that each note originates from the bottom of the stomach. For
these exercises, the objective is quick strokes, not how fast you can play
successive notes.
Fast play cannot be accomplished by learning one skill; it is a combination of many skills, and that is another reason why it takes time to learn. Speed is like a chain, and the maximum speed is limited by the weakest link in the chain. As the speed is increased, it becomes obvious that the basic keystroke must be abbreviated in order to play beyond a certain speed. The first change is to discard the hold which only wastes time. There must be an instant of relaxation between the downstroke and lift. Bad habits often creep in when practicing for speed. Some students might “simplify” the motion by keeping all extensor muscles tense (lifting all fingers) and playing fast by overpowering them with the flexors. That is clearly one way to create stress and build a speed wall because opposing muscles are fighting each other.
Other Speed Methods
Now, add all the other motions that lead to speed. We consider several general speed motions here; there are additional particular tricks for practically every difficult fast passage. This is why exercises such as Hanon are so harmful – they deprive students from learning these particular tricks, by misleading them into thinking that learning Hanon will solve all general and particular problems. An example of a particular speed trick is the unusual fingering of the RH starting at bar 20 of the 3rd movement of Beethoven’s Appassionata (actually, there are several possible fingerings). Here are a few general methods that apply to broad classes of applications.
The parallel sets teach all the fingers to move simultaneously so that successive notes can be played much more rapidly than the speed of each finger. But without first establishing a solid basic keystroke, the parallel sets can end up teaching numerous bad habits resulting in sloppiness. Flat finger positions can be faster than curled positions because they avoid curl paralysis and the fingertips of extended fingers can move faster than the tips of curled fingers. Also, by relaxing the last two phalanges at the fingertips, the motion is simplified.
Speed is the second most difficult skill to acquire, after musicality. The most common intuitive misunderstanding is that you need to practice playing fast in order to acquire speed. Experienced teachers know the futility of such a simplistic approach and have tried to devise methods for acquiring speed. One common approach has been to discourage students from playing fast – this approach will at least prevent all kinds of potentially irreversible problems: psychological, physical, musical, technical, etc., but does not address the speed problem directly and can slow down the learning process unnecessarily.
The mistaken notion that you must build piano muscles in order to play fast has led many to practice louder than they need to. Speed is skill, not strength. Difficult passages tend to cause stress and fatigue during practice. Playing softly reduces both, thereby accelerating technique acquisition. Students who play loud are masking their lack of technique with loudness, and growing slow muscles at the expense of fast muscles. Good tone is produced by “pressing deeply” into the piano. However, you must also relax. Do not keep pushing down after the notes are played. This constant down pressure not only wastes energy (causing fatigue) but also prevents the fingers from moving rapidly. Rhythm is important for speed. Rhythm involves not only the music as played by the fingertips, but also the entire body, so that one part does not move against another. Balance is another important factor. Not only the balance of your body on the bench, but also the center of gravity of each playing hand and of the two hands. Speed alone does not mean success. Speed, without proper technique, will ruin the music. Therefore, music is the criterion for acquiring speed – in order to acquire speed, we must play musically. We can play fast, but only up to speeds at which we can maintain musicality. This is why it is so important to play your finished pieces – don’t always practice new difficult material and ignore the finished pieces. These are the pieces that can be played at full speed, with relaxation, and allow you to practice speed.
Speed Walls
What are speed walls (SW), how are they created, how many are there, and how are they overcome? There is always a maximum speed that you can play. When first learning a piece, this speed is often below the final speed. If practiced incorrectly, the speed does not increase beyond a certain value no matter how hard you practice – this is called a speed wall. SWs are caused mainly by stress and bad habits, and are therefore erected by the pianists. There are as many SWs as bad habits, so there can be an unlimited number of them. Clearly, the best way to avoid them is not to create them in the first place. HS practice is one of the best weapons against SWs because most SWs are HT SWs. Outlining is another effective weapon because it allows the large motions to be correctly played at final speed, thus avoiding the SWs in these motions. Quiet hands is also helpful for similar reasons. Parallel sets are useful because you immediately start at speeds above the speed wall, and come down in speed. Relaxation is essential at all times, but especially necessary for avoiding SWs because stress is a major cause. Any method for increasing the efficiency of motion helps; thus mixing flat finger and curled positions, keeping the fingers on the keys, and the various hand motions, such as glissando, cartwheel, arm rotation, flick, wrist motion, etc., are all needed to prevent SWs. Musical play is not possible at SWs because any SW will be audible; thus in principle, if you always practice musically, you will never meet a SW. Clearly, practically every recommended practice method in this book is aimed at preventing speed walls.
What if you already have a SW – can you get rid of it? The best solutions are not to play it, or only playing it slowly, for weeks or months and learning something new during that time. Learning new things is a good way to erase old memories. Properly designed HS, PS practice with relaxation might work. Early detection of SWs is the key to removing them successfully – this is why we need to know all about SWs. Students who used intuitive methods for a long time will have many speed walls that are so well established that they are nearly impossible to tear down. The best solution is to abandon those pieces for a year or more, learn new pieces, and come back to them when your technique has improved by a significant amount.
In conclusion, speed can’t be acquired by forcing the fingers to play faster than they can at their technical level because you will lose relaxation, develop bad habits and erect speed walls. Speed is a combination of many skills. The basic keystroke must be maintained even at high speed. The best way to stay within your technical limitation is to play musically. Use PSs, cycling, etc., briefly to increase speed with less attention to musicality, but make that an exception, not the rule. Therefore, even repetitive cycling for long periods must be practiced musically. Making music frees you from the speed demon and leads you into that magical realm of the wonderful sound of the piano.